


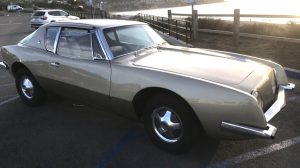
So now that I’ve announced my dirty little secret to the world, it’s about time to get my 1974 Fiat 124 Spider back on the road. Obviously my car is in need of a lot of work, but I decided to just start tackling each issue one at a time. Well one major problem that needed addressing was that leaking differential. Now I’m not talking about a small leak, it was literally pouring oil out. So I did some research and decided to see if I could fix the leak the easiest way possible. Since I’m tired of the garage smelling like gear oil and it seemed like a simple enough job, I went ahead and filmed the entire process and got it done in about an hour and a half. I thought you guys would be interested in seeing how I fixed the problem and hopefully my story will motivate others to get out into the garage. Read the entire process after the break or skip straight to the bottom of the post to watch the video!

I feel I need to premise this post by stating that I’m by no means an expert, so if you follow my instructions and damage your differential in the process, please don’t blame me! Now that we have cleared that up, here is how I fixed my leaky differential. Before I bought anything or tore anything apart, I pulled out my Fiat Shop manual and studied the differential (see diagram above). I had read of people fixing their leaky differential simply by replacing the pinion seal (the oil seal highlighted in red to be exact). After studying the diagram and my Fiat’s leak, I decided it had to be the pinion. Now there are really two ways to skin this cat, the easy way and the hard way. To guarantee that it won’t leak any time soon, one should plan on doing it the hard way by pulling the diff apart and replacing all the seals and bearing, but I want to drive my car right away and if it can be done easily without pulling this delicate differential apart, that’s the way I want to do it. I ordered a brand new Timkin seal for about $7 from RockAuto, but just about any parts store can get one for you. Make sure you order the right size of seal for your car though, as different years have different differentials.
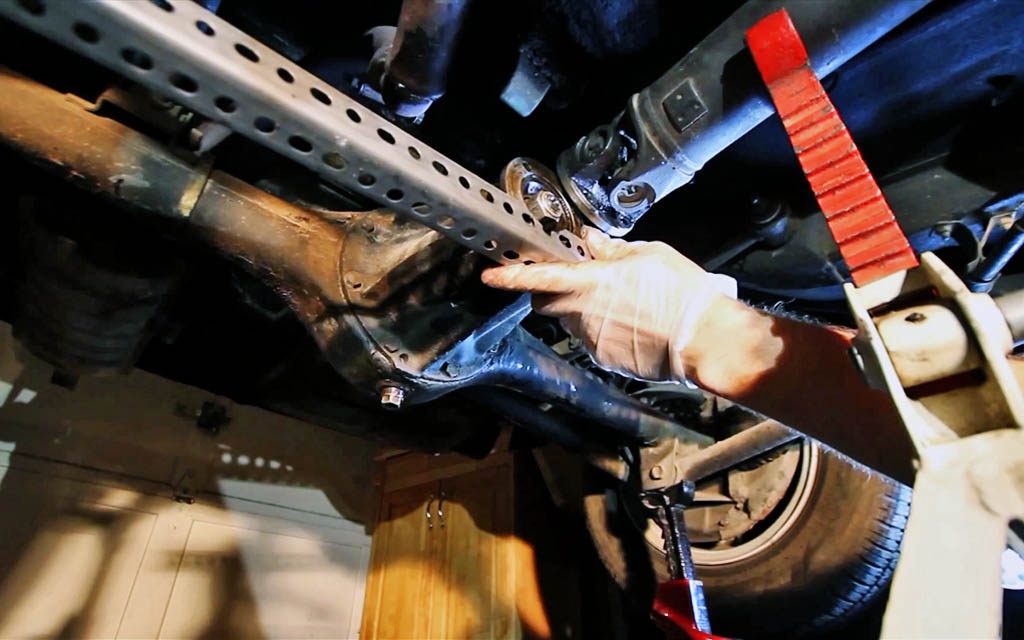
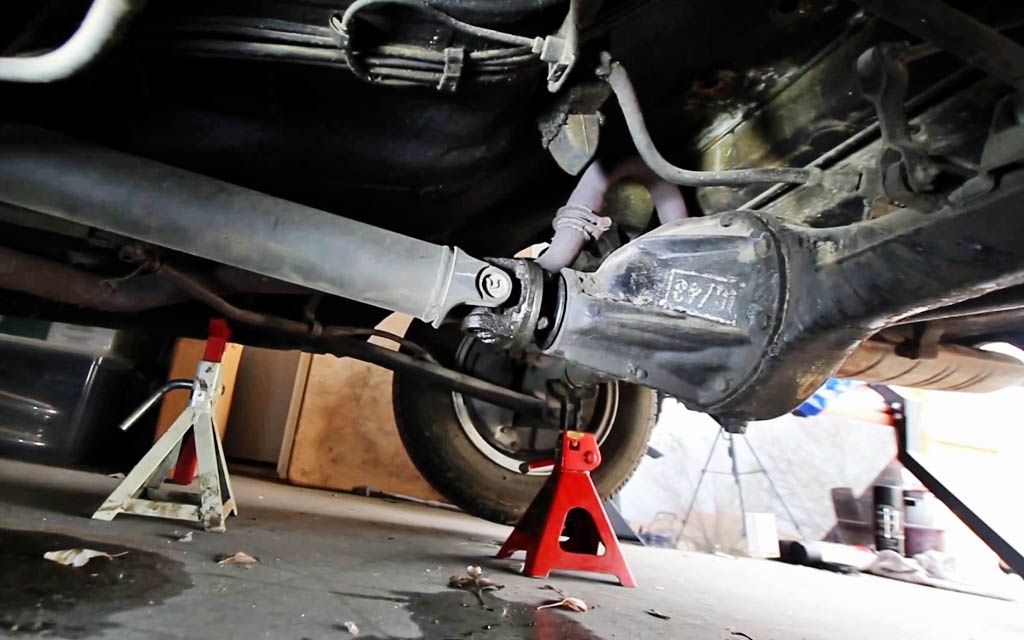
So once the seal arrived, I was able to get the car pulled apart and ready for the new seal. After getting the car up on jack stands, I was able to disconnect the drive shaft from the differential to expose the pinion nut. Be sure to mark the drive shaft and differential before pulling them apart, that way when you put it back together you can get it lined up correctly. Almost immediately after disconnecting the drive shaft on mine, I realized I was going to need something to hold the flange in place to remove the nut. I stopped at several parts stores, but none seemed to have the correct tool for the job, so went to a lumber yard and bought myself some of the angle iron commonly used to mount garage door openers. The holes almost lined up exactly with the flange and, with a small notch, gave me great access to the pinion nut. You can see my contraption above, but it actually worked quite well. Once I had it attached to the flange, I was able to remove the nut. Now there are a few extra steps you will want to take here. First, use a torque wrench to remove the nut so that you can measure how tightly it was installed. I used a beam style wrench, but any type that allows you to measure the force needed to remove it should work. Also, I’d recommend counting how many rotations it takes to remove the nut from the pinion. It probably isn’t necessary, but is good to know just in case you are worried about that crush washer. I also marked the pinion nut’s position before removing it as another backup, but it probably wasn’t necessary.
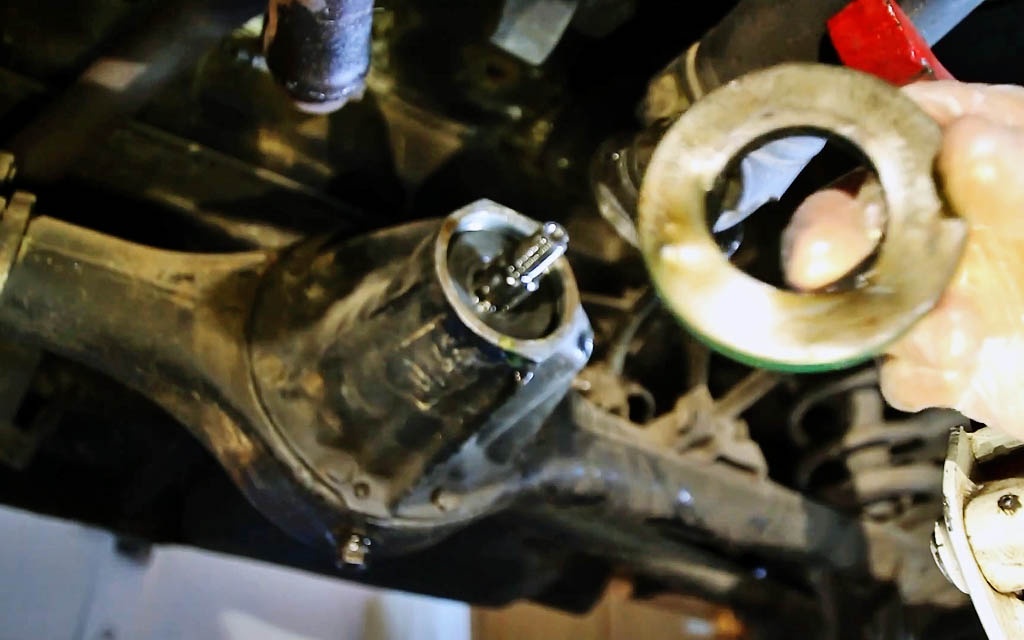
Once I was able to get the nut off and the flange removed, my differential proceeded to drain the remaining fluid that was against the seal. Thankfully, I had put wax paper down on the floor before removing it, so I was able to catch most of it. I’d recommend putting plastic down before working on it, as the smell of gear oil can be a nightmare to get rid of. If you do get oil all over, I discovered that the citrus based hand cleaner does an amazing job of getting rid of most of the odor. I’d also recommend draining the differential before trying to pull the seal. It will make clean up easier and keep oil out of your face and hair, trust me on this one. I learned the hard way! To get the seal out, I used an actual seal pulled, although you can do the job with a screw driver. Prying it out will likely bend the seal, but you’re going to throw it away anyway.
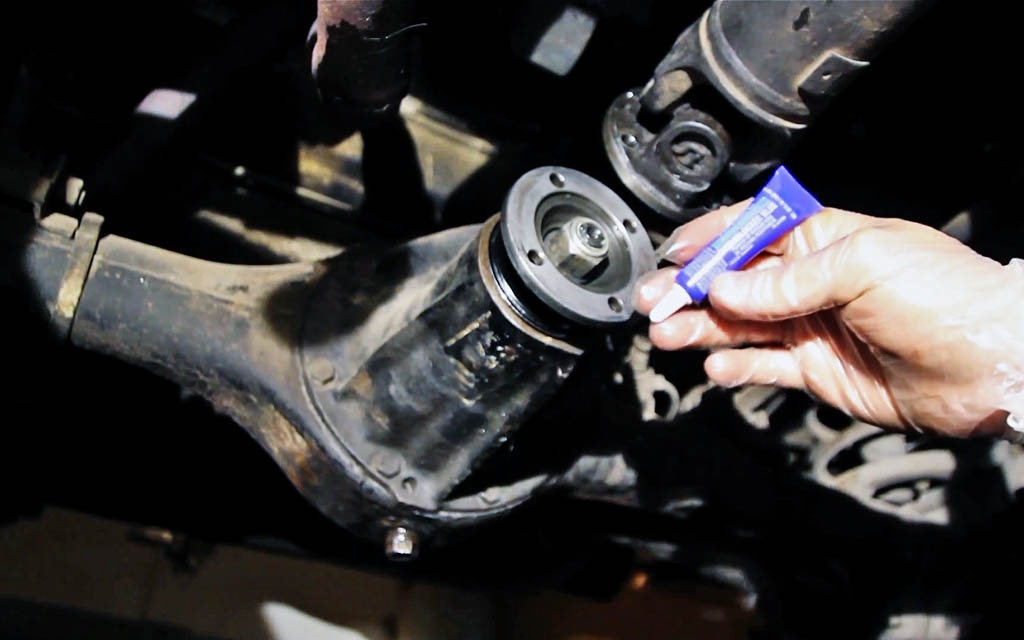
Once everything is cleaned up, the new seal can go in. Make sure it is level with the housing and that if fits snugly. With the new seal in place, the whole thing can go back together. Other than installing the pinion nut, the job is the exact reverse of disassembly. When putting the nut back on, you’re going to want to make sure to tighten it back on only slightly more than it was on there when you removed it. And you’re going to want to install the secret ingredient that makes the “easy way” work. Even with a new seal in place, oil can still make its way down the threads of the pinion. To stop this, we need something between the pinion and nut to block it. I decided to try Threadlocker, but I’m sure RTV silicon would work too. Once you have your thread seal in place, you can torque the pinion nut on. If you over torque it, you will likely have to replace the crush washer. Mine was well below factory specification, so I torqued it to the lowest range the manual called for. If yours was already at 17 lbs. when you removed the crush washer, I would recommend replacing it. Also, be sure to line everything back up using the marks you made on the flange and drive shaft.

Once you have it all put together you will want to drain the remaining gear oil from the diff. I lowered mine back down to the ground to drain the remaining fluid. Once it was fully drained, I was able to pump new 75w-90 fully synthetic gear oil into the top of the diff. To do the job, I bought this oil pump. It was much easier than using a small hand pump and came with an adapter hose for pumping oil through a dip stick. The adapter hose was the perfect size for my differential’s access hole. Once I had the pump all setup, I pumped the recommended 1.4 quarts of oil into it. After putting the plug back into the top of the diff, I let it sit overnight to give everything time to settle and to make sure I wasn’t leaking. As of today, there are no new oil spots on the floor or any signs of oil leaking from the front of the differential. In total I spent about $50 to get all the parts, tools, and oil to get the job done. I’m sure when I’m out on a lovely summer evening with the top down, it will be money well spent!
Hopefully I covered everything you will need to know to do the job yourself. I’m sure I missed something or called something by the wrong name at some point, but I’m pretty happy with the final results of the job! Once I get that timing belt replaced and the rest of the fluids replaced, I’m going to take her out for a spin. After I’m able to put some miles on the car, I’ll be sure to update you guys on how the “easy way” holds up. If you have any comments or questions, please feel free to leave them in the comment section below and I’ll try to get back to you as soon as possible! Also, if you haven’t watched my video guide above, be sure to check it out! There will be more videos of my Fiat to come and I want to make sure they are helpful and even enjoyable to watch.
Here is a list of the things you’ll need:
- Replacement Pinion Seal
- Replacement Crush Washer (only necessary if yours is damaged)
- 13mm Wrenches
- 15/16 or 24 mm socket
- Torque Wrench
- Angle Iron or Pinion Flange Holder
- Threadlocker or RTV Silicon
- 75W-90 Gear Oil
- Oil Pump
- About 2 hours of spare time


That was great! First time I got that close to the action without getting grease on myself!
Well I’m glad you enjoyed it John! It felt great to get a little greasy, although I hate gear oil and that terrible odor.
Don’t know why, but I love the smell of gear oil. Great article.
At first I didn’t mind it, but once I got it in my hair and on my face I quickly came to hate it. Once I discovered how well Gojo works to get rid of the smell, my life got much better!
An email version of a Haynes manual ! Well done – great article. Good luck with the other jobs……..
good job, can not wait to see this car back on the road. maybe an autocross race to see if it is faster than a 1990 miata.
A handy little trick is to slip a condom over the tail shaft of a tranny when removing to keep gear oil from dripping out if you don’t have a spare yoke to slide on the splines.. By the way it’s sulfur that gives gear oil that terrible smell.
Looking forward to seeing this car on the road. Updates please! The 74 Spider is unique as it is the last chrome bumper car. Looks more like a sports car then the later models with the big energy absorbing units. Great project.
check your breather ,if they get cloged with dirt,road film, they can cause your pinion seal to leak when the 90 weight gets warm
Please note: Mechanics don’t have the leisure time to waste looking for a piece of angle Iron stock to stop that pesky “for every action, there is an equal and opposite reaction”… That said, [WE SET THE EMERGENCY BRAKE] before jacking up the the car……………. Works great every time!!!
My Haynes manual states that the Collapsible spacer must be renewed every time the pinion shaft end nut is loosened for one reason or another. What is your thoughts on this statement? I don’t want to replace the spacer if I don’t have to in the process of replacing the oil seal. Thank You