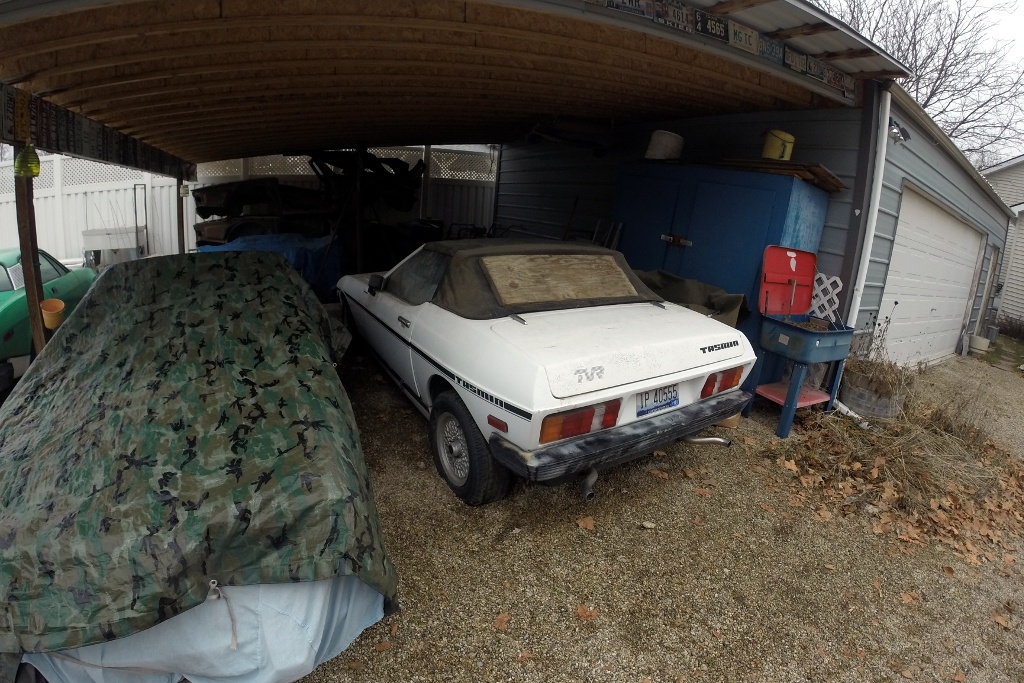
As I’m sure many of you are aware, we bought ourselves a TVR! Yes I know, the Tasmin isn’t the most attractive TVR nor is it the fastest, but it’s still a TVR! We had quite the eventful first day and I thought it would be great to do a bit of a recap. After all, it isn’t every morning that you get to drag home a TVR! I also thought you guys might enjoy seeing the process of breathing life back into this rather rare project. I will just layout the entire day starting with getting the car and what all we have done to it so far!
I can’t speak for Jesse, but I didn’t sleep much the night before. I felt like a kid waiting for Christmas morning! So I was up and ready for the days events before the sun was even out. Finally at 9:30, we jumped in Jesse’s Volvo and headed to Bruce’s place. We had scheduled our usual tow service to come get the car at 10 am, but we figured we had better get the car pulled out onto the street to save Bruce’s driveway from the weight of a loaded flatbed. It was a cold and foggy morning, but that wasn’t going to keep our spirits down. The low tires and thick gravel on the other hand would. Thankfully, when Bruce got out to the car port where the TVR was stashed, he had planned ahead and brought a tow strap and his truck to save our backs!

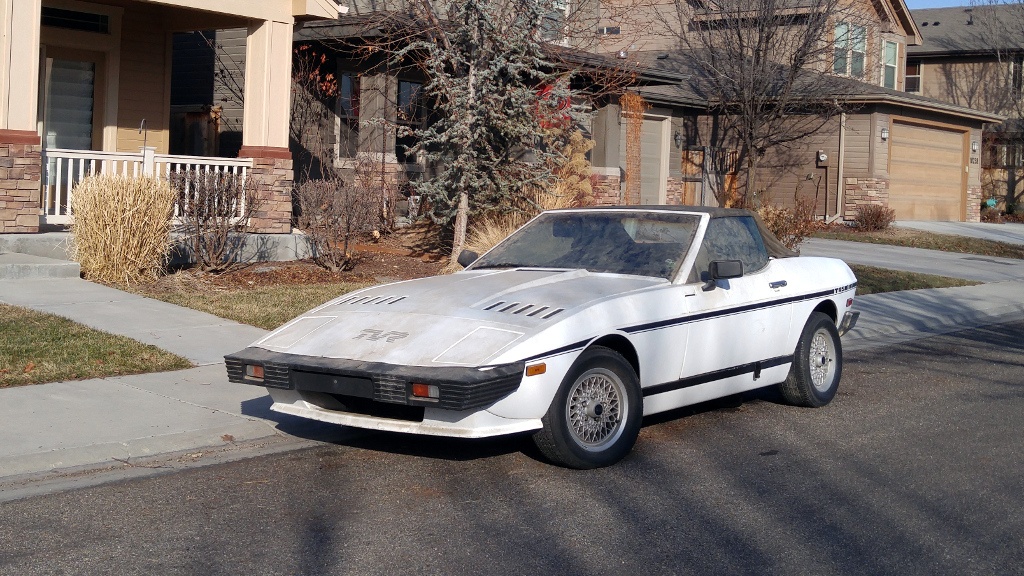
With a tow strap hooked on and Jesse behind the wheel of the TVR, I guided Bruce as we slowly pulled the TVR out from under the car port it had been parked in for at least the past 7 years. That’s when we finally got our first glimpse of the car out in the light and boy did it look incredible! Once we had it out on the street, we all stood around admiring the odd design. I know what you may be thinking, yes it is a wedge, but there is something strangely attractive about it. You don’t get a full sense of how cool this car really looks in photos, it is just one of those designs you have to see in person to appreciate.
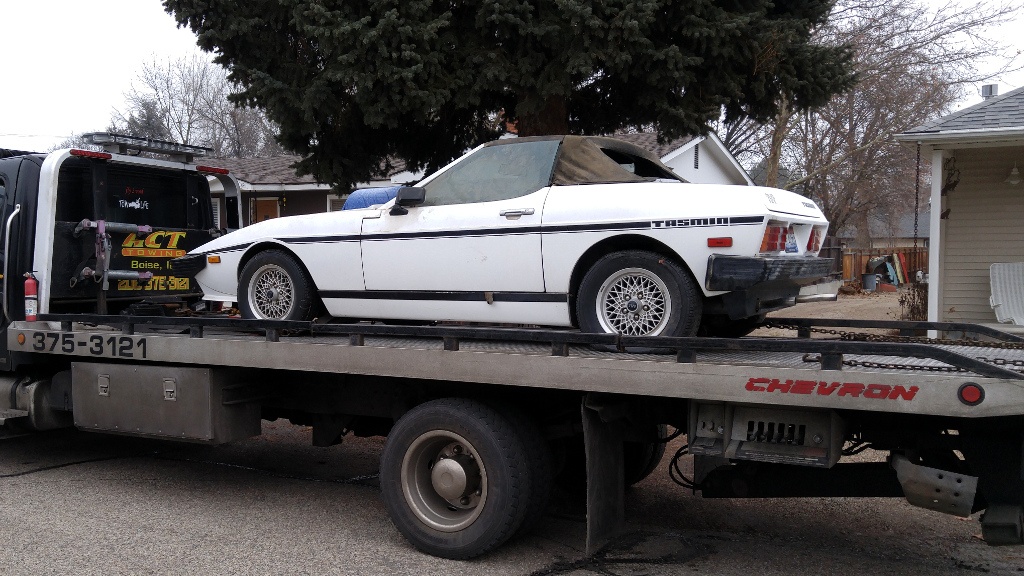
Finally, the tow truck arrived and as soon as the driver was out of the truck he was asking what it was! He thought it was an MG, a Fiat, or maybe even a Triumph, but he had no clue exactly what it was. After he gave it a good inspection, he started loading it up on the truck. We were having such an enjoyable time talking to Bruce, we didn’t even notice when the driver had the car all loaded up. He finally came over and asked where he was taking it. So we gave him the address, handed Bruce the money, and said our goodbyes.
We managed to beat the truck home and were there eagerly awaiting its arrival! On the drive over, we had already put a plan of attack together. Bruce told us the car was parked after the fuel pump went out, so we knew that was one of the first things we would check out. We also knew we would have to do all the usual pre-startup tasks. This isn’t our first time starting a barn find, so we knew what needed to be done before cranking her over. First the oil gets drained, the oil filter replaced, the gas tank drained and flushed, a full visual run down of all the mechanicals, a detailed check of all the fluids, and the usual test of the electrical systems is performed. It usually goes pretty quickly and without much drama, but this car is a bit different than anything we’ve ever worked on before!

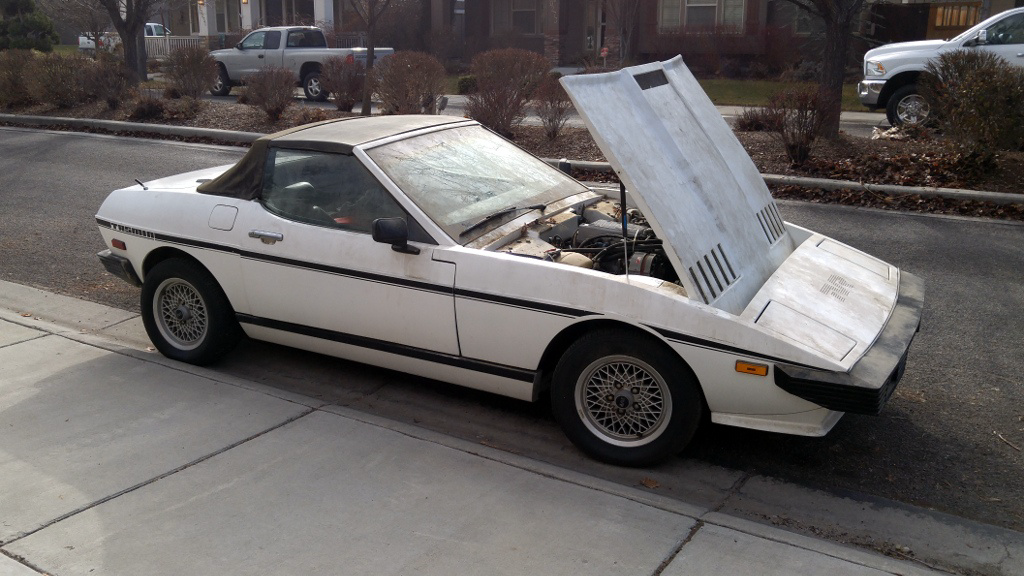
As soon as the car was on the ground, I was under it doing my usual inspections. I noticed almost immediately how far back the engine sits. This car has to have a 50/50 weight distribution or as close to it as you can get! That’s a great thing for handling, but not so great when you’re working on it. Jesse had to run to get some supplies, so I got started on draining the oil. That’s a fairly simple task, although there isn’t much clearance between the chassis and the ground, so even with the car on jack stands, it was a tight squeeze. I also had to do a bit of hunting to find the oil pan plug, since the tube chassis wraps around the motor it was a bit difficult to spot without being under the car. While I awaited Jesse’s return I started working on the fuel pump. These car’s use a Bosch K-Jetronic injection system, which we’ve had some experience with in the past. I knew if the engine wasn’t getting fuel, it was most likely the fuel pump or the injection system’s fuse, which sends power to the fuel pump. The battery in the car was beyond dead, so testing the fuel pump wasn’t going to be as simple as turning the key and checking for power.
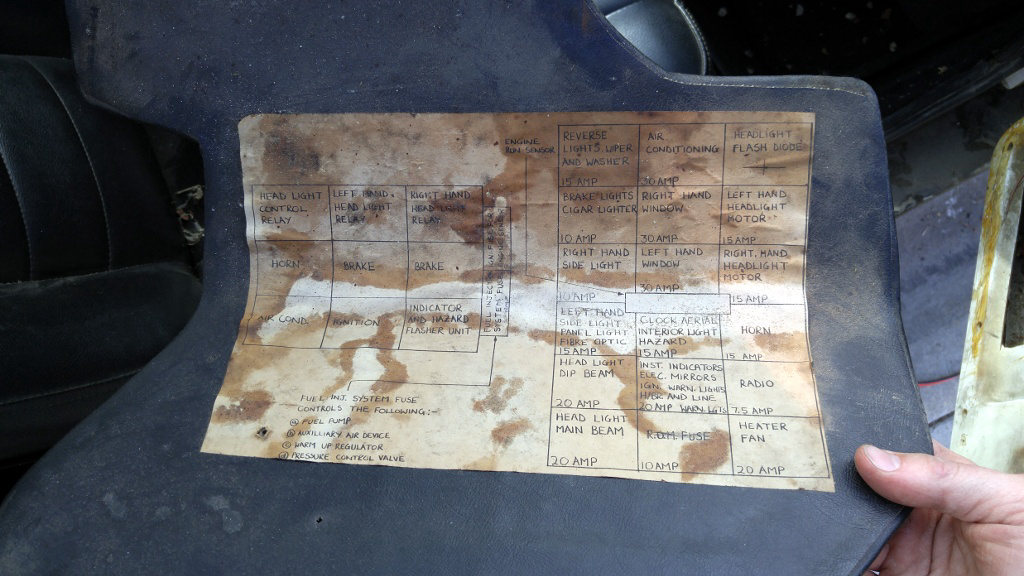
I actually decided to check the fuse first since I was waiting for a good battery. Checking said fuse should be as simple as finding the fuse box and pulling the fuse out, but remember, I’ve never experienced a TVR before and had no clue where said box may be. I had to do a quick search online to find out where said fuse box was located. It turned out to be hidden by a panel right under the glovebox. I found two thumbscrews, which came out easily, and soon I had the panel off. I then realized I had no way of knowing which fuse was which. That’s when I noticed a neat diagram drawn on the panel I had just removed. This is one of the coolest things about a hand-built car like this, talk about a personal touch! Clearly the worker responsible for installing the panel at the TVR factory was tasked with hand diagramming and writing each fuse and relay’s location. You just don’t see things like this on mass produced cars. I was able to quickly locate the fuse I was looking for, which turned out to be in good. With that checked, I put the fuse panel back on and moved on to the next task.
Jesse finally showed up with supplies, so we moved on to removing the oil filter, which turned out to be one of the most difficult oil filter replacements I’ve ever done! You see, the oil filter on the Ford 2.8 V6 is located on the passenger side and is pushed pretty far back on the engine. Remember how I mentioned how far back the engine sits? Well, not only was getting to the filter is a challenge, but getting it off was something special! You see, who ever changed the oil last tightened the filter on just a bit too tight, so it couldn’t be spun off by hand. I’m pretty sure even if the filter was more easily accessible, it would have been impossible to remove by hand. We had an oil filter wrench on hand, but we couldn’t get it between the fiberglass body and the end of the filter. We tried the classic screwdriver through the filter technique, but it was on there way too tight for that to work. So Jesse had to make another run to the store to get a different style of filter wrench. Once he got it back, we were able to get it off, but ran into another wall. We had a replacement on hand, but it turned out to be too long and wouldn’t fit between the motor and the body, so we had to make another run and get an exact replacement of the Fram PH16 that was on the motor originally. With that replaced we dumped about 4 quarts of fresh oil into her.
With the oil in, I decided it was time to turn the motor over to build up some oil pressure and see if the fuel pump really was bad. We strapped a battery charger to the old battery. Jesse grabbed our electrical testing equipment and setup to test the power going to the fuel pump, while I gave it a quick flick of the key. Sure enough we were getting power to the fuel pump, but it wasn’t pumping. The typical sounds of an electric fuel pump weren’t there, so I gave it a few more cranks to start getting oil pumping through the engine.
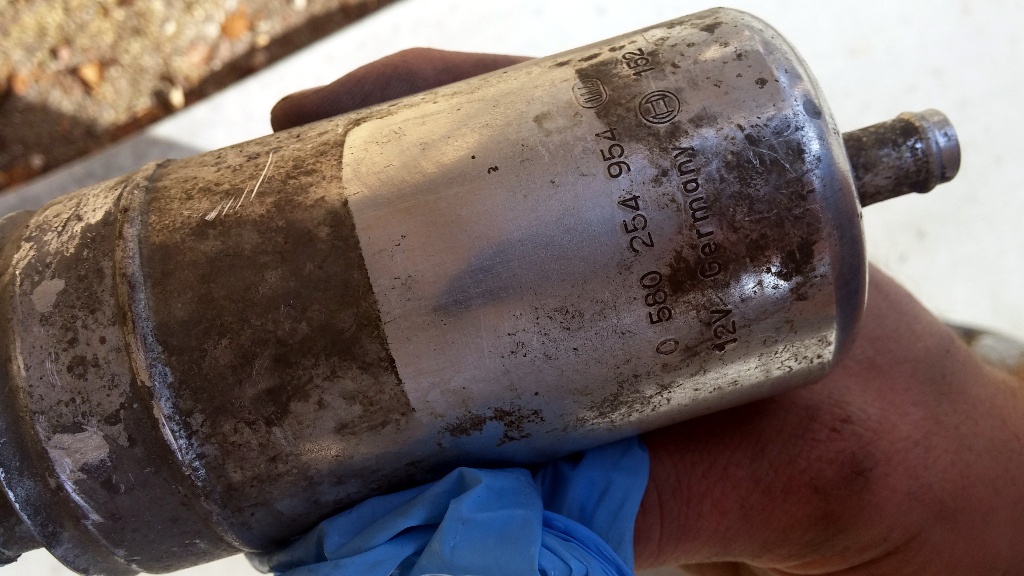
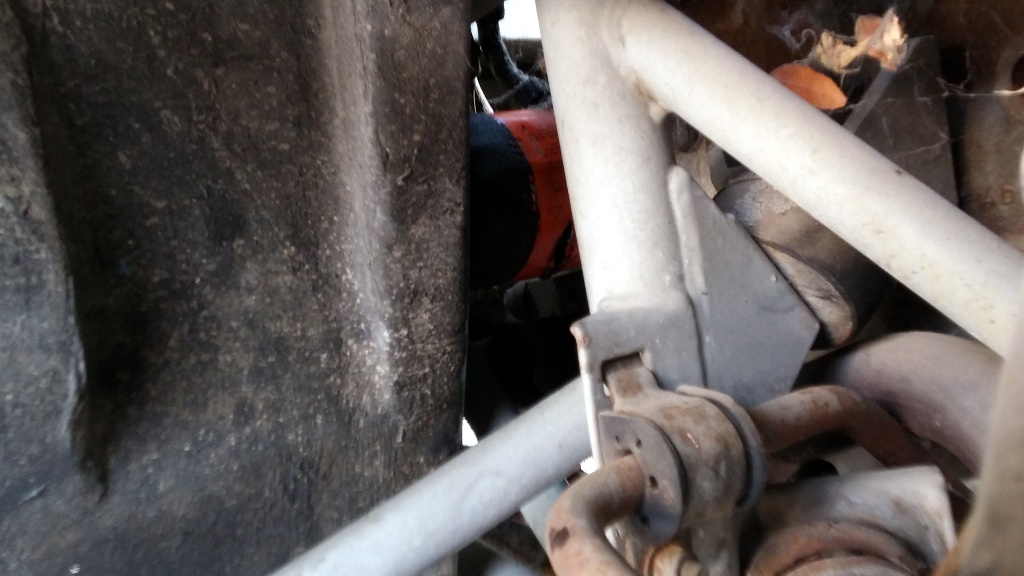
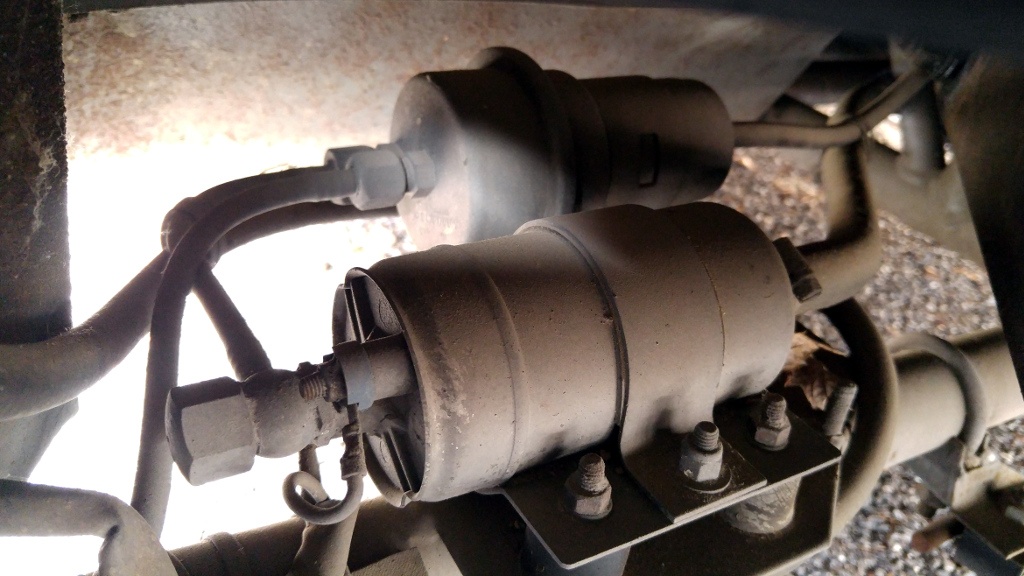
Next, we started the task of removing the defective pump. It’s mounted in front of the driver’s side rear wheel and is pretty easy to get to. It ended up taking both of us to get the pump off, but we were then able to quickly bench test to confirm that it was dead. While we did that, we drained the fuel tank and got a big whiff of that familiar varnish smell. We accidentally damaged the high pressure line that runs from the pump to the accumulator while we were under there, but thankfully we were able to put together a replacement. We still need to find a new fuel pump, which will be interesting as they stopped producing the original Bosch unit long ago. We’ve heard that any pump from a car that used K-Jetronic injection will work, so hopefully one of the part stores will have one on hand!
We finally called it quits after for the day, as we had received a phone call about another find. While were were putting things away, I decided to jump in the driver’s seat and test some of the electrical components real quick. I discovered that the power windows still work, the heater fan comes on as it should, the gauges seem to be working (at least the volt meter and oil pressure gauge), and that this car was originally fitted with A/C! It turned out to be one incredible day, but we still have a lot of work to get this TVR running. Stay tuned for more updates!

That Bosch number changes up to a 0580 254 957, according to The Bosch Fuel Pump Interchange I found, which is ready available… Fits various Audis, VWs, and BMWS ranging from ’77-’89…
Over the counter here in Canada, it sells for about $250/cdn..
Hope that helps.
We actually cross referenced the part number and discovered it is similar enough to Bosch part 69609. The parts stores here don’t have that one anymore, but they do have the generic version of it that we will be going with.
You got me thinking and sure enough, I didn’t think to dig further… the Bosch number I gave you also crosses to a Bosch 69430 pump and an Airtex E8305 pump….just in case the one you are using doesn’t work out…
Josh, this is like deja vus all over again! I found a barn find TVR 280i (1984 model, compared to your 1983) and brought it back to life some years ago. It was also white. If you would like to get in touch with me, send me an email and I’ll be glad to assist any way I can. Ive included a photo of my car after the work on it was complete.
Marshall
Historian and Model Registrar, TVR Car Club North America
Wow, it looks great Marshall! These cars seem very underrated. We haven’t driven one yet, so we cant comment on that, but after looking at ours up close there is no denying that it is something special.
I’ve got to say, it does look like a cool car. Nothing I’d expect from England. You know, there’s something gratifying hearing about others having the same problems I had restoring cars. And don’t kid us, you slipped behind the wheel, not to check the gauges, but what it will be like to drive. :) ( 10 to 1 it stays in the “BF’s” family)
Nice job Birdman!
Thank you! I’ve been in the auto parts game for about 13 years and in the automotive game as a whole for about 25 years..
I have a knack, for some reason, for finding the oddball, hard to find stuff… My wife says I should start my own online part finder business.. hehe..
Anyway, thank you for the compliment!
That whole assy’ looks like the one i had on my 1986 Mercedes 190e 2.6 accumulator and all. Even mounts in the same location-in case you are looking for more parts.. The Benz parts are available way back. Looks like it’s going to be a great project!
I like this chapter of barnfinds a lot.
Please keep this going. I love reading about car restorations. Love seeing the finished product and knowing about the hard work that went in to making the car usable again.
Parts are very common just by looking at that filter, banjo fitting set up. Listen, the old saying ‘ parts are parts’ is very true. Even if a part is made of unobtainium something will fit, function and get you through a bind. Fear not the smaller marques builds… they got parts and technology from someone. Very simply because it costs WAY to much develope it all yourself. Small companies have interesting designs, not built by commitee and will utilize existing ‘hard parts’ to reach their design and finacial goals. Get in a bind, P.M. me, been in this since ’75 and built to many to name. Also been in service industry since then. ‘Nough said… wish you all the luck in the endeavor.
Cool! Here’s hoping you get some fuel pressure and fire it up!
Probably a good idea to check the injectors as well for a good spray pattern, they may be gummed up. That can probably wait until after a test fire.
Also good to check the ignition timing to sanity check that it isn’t way off too.
Nice write up. I’m not sure if it’s been previously suggested, but these days many things are on you tube. Perhaps some Barn Finds how to videos? The basics of getting a car going after long storage would be something that could be done once and cover the majority of situations. However, on a project like this ‘out of the ordinary’ TVR you’ll likely be undertaking some unusual adjustments or repairs that aren’t documented elsewhere in that format…
Cool, it would be really cool for you to post some videos of you guys firing that thing up?
It looks like an easy flip if she runs!
We will do a short video when we are ready to attempt it. Getting close now.
Love it! Good job guys
TVR! Two Vehicle Required!
I was the national service director for TVR of America from 86-89. I’ll be glad to give you any info I can.
One thing right off-you got a really early car. I only remember seeing the slotted hood in pictures. And its labeled a Tasmin-not a 280i. It was brought in before 84? Maybe early 84.
Almost every part on that car came from something else. English Granada was the main one. And they were hand built-with hand tools. Meaning you should be able to do everything yourself.
I’ll be glad to help out if I can. Feel free to email me with questions.
Thanks sdwarf36, it’s an 83. These were interesting cars. With a tube frame chassis and Momo rims, we almost feel like we are wrenching on a race!
the TVR car club of north america knows you have this car for sale, which is very good. bidding on this will be interesting. how is the wood in the dash?
The wood has seen better days, but I think we are going to leave those kind of things up to the next owner. Wood kits are available at fair prices, but I doubt replacing it would increase the value of the car enough to justify the cost. There isnt a very big spread between what we paid and what it will be worth running so our budget has to go to the most important items first.
Great write-up! Great to hear everyone’s comments… I am personally happy to see you not doing the ordinary old mustang or other common american cars. This makes it a bit more challenging and for me, anyway, more interesting! Best wishes!….
Hey Jesse, I’ve tried posting to this thread a couple times with links.
Usually when a post has a link there is a period of waiting for moderation, but this time nothing. The posts just disappeared. Is there any reason? One was a link to a tool I was suggesting, another to a Photobucket link of mine showing an alternative solution.
I don’t want to inundate the system with multiple attemps needlessly.
The more I look at photos of the wedge TVRs the more impressive they look to me, despite not having the vintage gradual curves that make the exotic cars look good. I think they look better than the TR7/8 wedge by a long shot, and that odd convertible rebody of a Honda Civic from earlier today doesn’t even show up on the same scale.
I think a lot of us are going to be very interested in following the progress of this car back to full roadworthy condition. And don’t forget to give us your full driving impressions too.
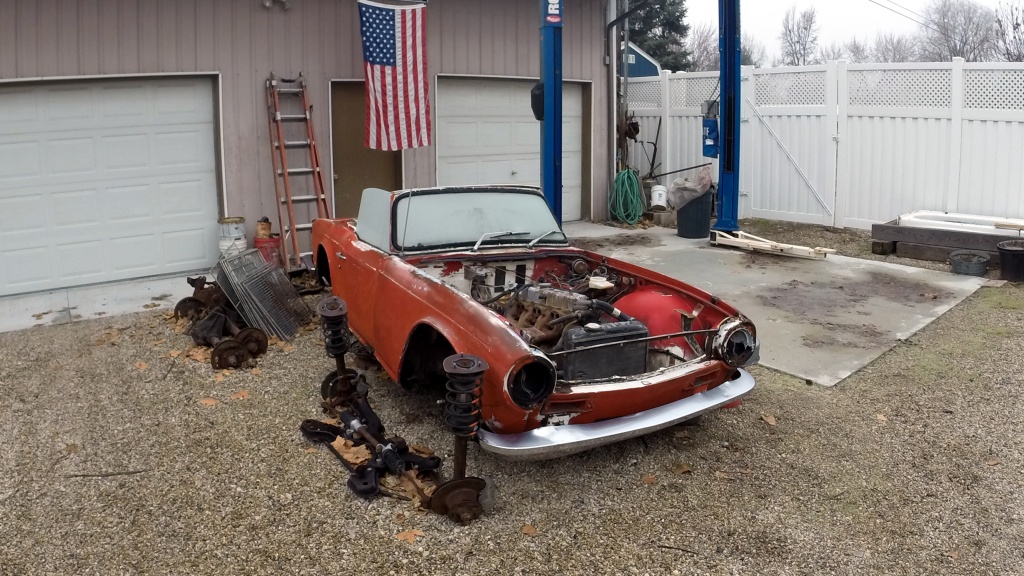
What’s with the tr4 picture ?
It was just another car sitting in that yard.
Don’t know if there is room, but an old tank has hidden things in it. Get a large PRE filter inline, half inch barbs, and save the NEW electric pump from fouling (and replacing) again.
Don’t ask how I know!
That is probably not an accumulator as much as a filter after the pump. Or there could be a vapor separator on the tank vent line(emissions) which should go to the carb area.Just like my spider with K-Jetronic injection. Should have a by pass type regulator(2.5 bar) in the engine compartment.
So in review, 3 lines, 2 tank to engine, 1 return to tank.
Ok, now you all know how I know!
Any reason not to use a new aftermarket pump?
No, an aftermarket pump should work fine.
Thanks for this post – working on a car with a fuel pump issue, so it was great to read about how you tackled this. I really like this work-in-progress post.
I do not post very often but I really enjoy your write ups. Keep up the great work and let everyone know when this goes up for sale. Wonder what shipping would be to OH
Just one suggestion, regarding cars that have been sitting….
I disagree with your checklist …” First the oil gets drained, the oil filter replaced, the gas tank drained , etc, etc ”
FIRST, remove the spark plugs and put an ounce of marvel Mystery Oil in each cylinder . One stuck ring ( causing cylinder wall damage) will make you never skip doing this this step FIRST, again… just put the plugs back in with a couple turns to keep trash out of the cylinders ……………… Later, removing the plugs again, when turning the motor to build oil pressure, will save your starter.
Stay focused….
Dave
+1…………are we related?
Dave,
I removed each plug and sprayed Seafoam into each cylinder. I did this with almost every one of my fathers vehicles that has been sold.
Bruce
You’re right Dave, normally we would squirt oil into all the cylinders. We knew that Bruce had been starting the car every so often though and the engine turned over freely so we felt safe with an oil change.
I just found my old shop manual. Care to borrow it?
Awesome find ! Quite the car in its day ! Have fun, good luck !
What happened, did it start? Update us man, don’t leave us hangin
Update coming soon!